Creating One-to-Many Email Forwarding in Google Apps
 James Miodonski 20th of April 2016
Google have a fairly long history of building amazing systems, not telling people about them and not making a huge amount of technical support information public either. Instead, they rely on – superbly manned, I hasten to add – support forums on a Q&A type basis, with an ever growing knowledge base resource to sift through.
Here’s a quick & dirty guide to adding an email forwarder – say [email protected] – to multiple recipients (say [email protected], [email protected] and so on) from within your Google Apps for Business console.
For individual users you can use the Alias option, which is perfect for situations where a person needs multiple email addresses for their own account. Let’s say [email protected] gets married and changes her name. Adding an alias to her existing email account means she’ll receive mail sent to both her old [email protected] email address and her new [email protected] address. Make sense? Good ‘oh.
Where this falls over is when you have a single point of contact email address that needs to be sent to multiple people, such as a sales ([email protected]) or tech support team ([email protected]).
Traditionally, these are done via your hosting account – log into there and add in as many email forwarders as you like. However, once you’ve handed power of your email over to Google (which, by the way you almost certainly should consider doing so), this no longer works.
So, the short answer is that it’s done via Groups. Here’s the longer answer in a little more details.
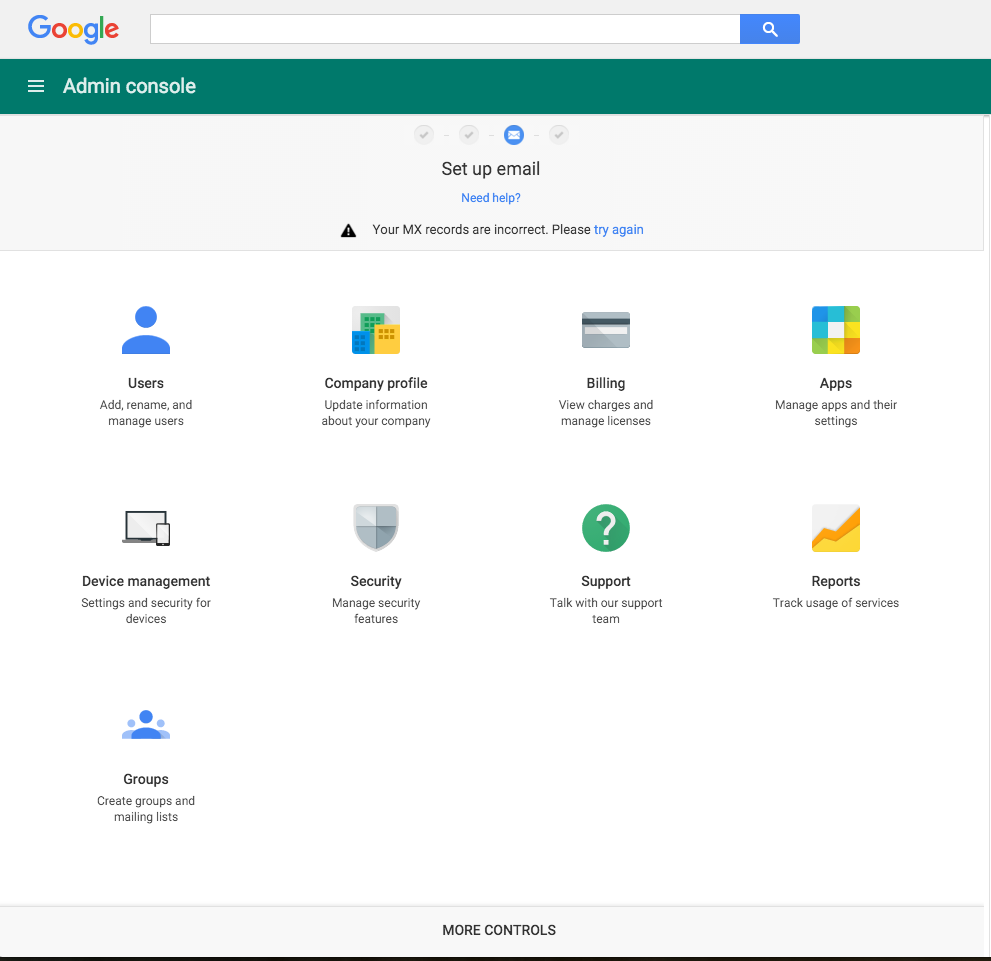
Log into your Google Admin dashboard
From here click on the More Controls link at the bottom of the screen and click the + sign within the Groups icon to add this service to your dashboard.

The Groups icon will now appear in your dashboard every time you log in.

Click onto Groups, and hit the + button in the bottom right to create a new Group.

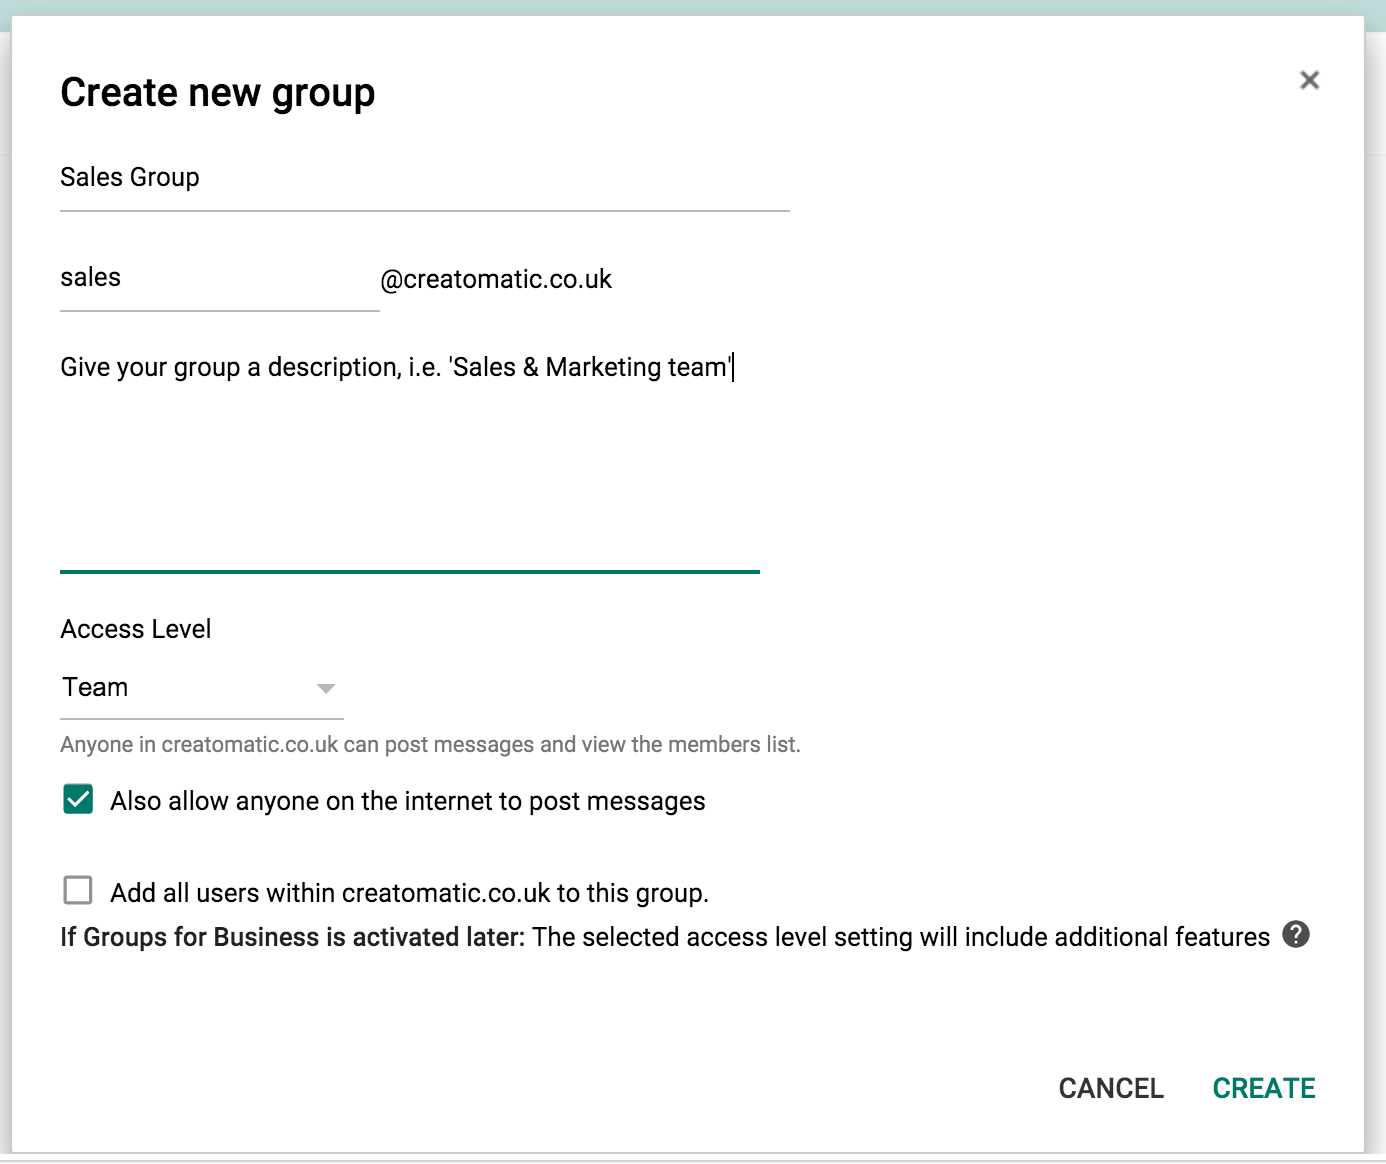
Create new group
Give your group a name, email address (e.g. sales@) and a description.
Under Access level, select Team and *important* – make sure that the ‘Also allow anyone on the internet to post messages’ box is ticked. This allows people from outwith your company to send email to the new group email address.

Click Create.
Next, to add the recipients of the new group email address click ‘Manage users in GroupName’

On the next screen, type the email addresses you wish to add to the group.

Once all names & email addresses have been added, click the ‘Add’ button. They’ll appear underneath in a list if this has been done correctly.
Adding them as members (*as opposed to owners) is fine, at least for this purpose.

That’s it!
The next stage is to send a test email (ideally from an external email address from your company account, e.g. a personal Hotmail/Gmail account) to the new group email account and make sure everybody you expected to receive it got the email.
If all’s good, happy days – job done!
More info here if you need it: https://productforums.google.com/forum/#!forum/apps


